
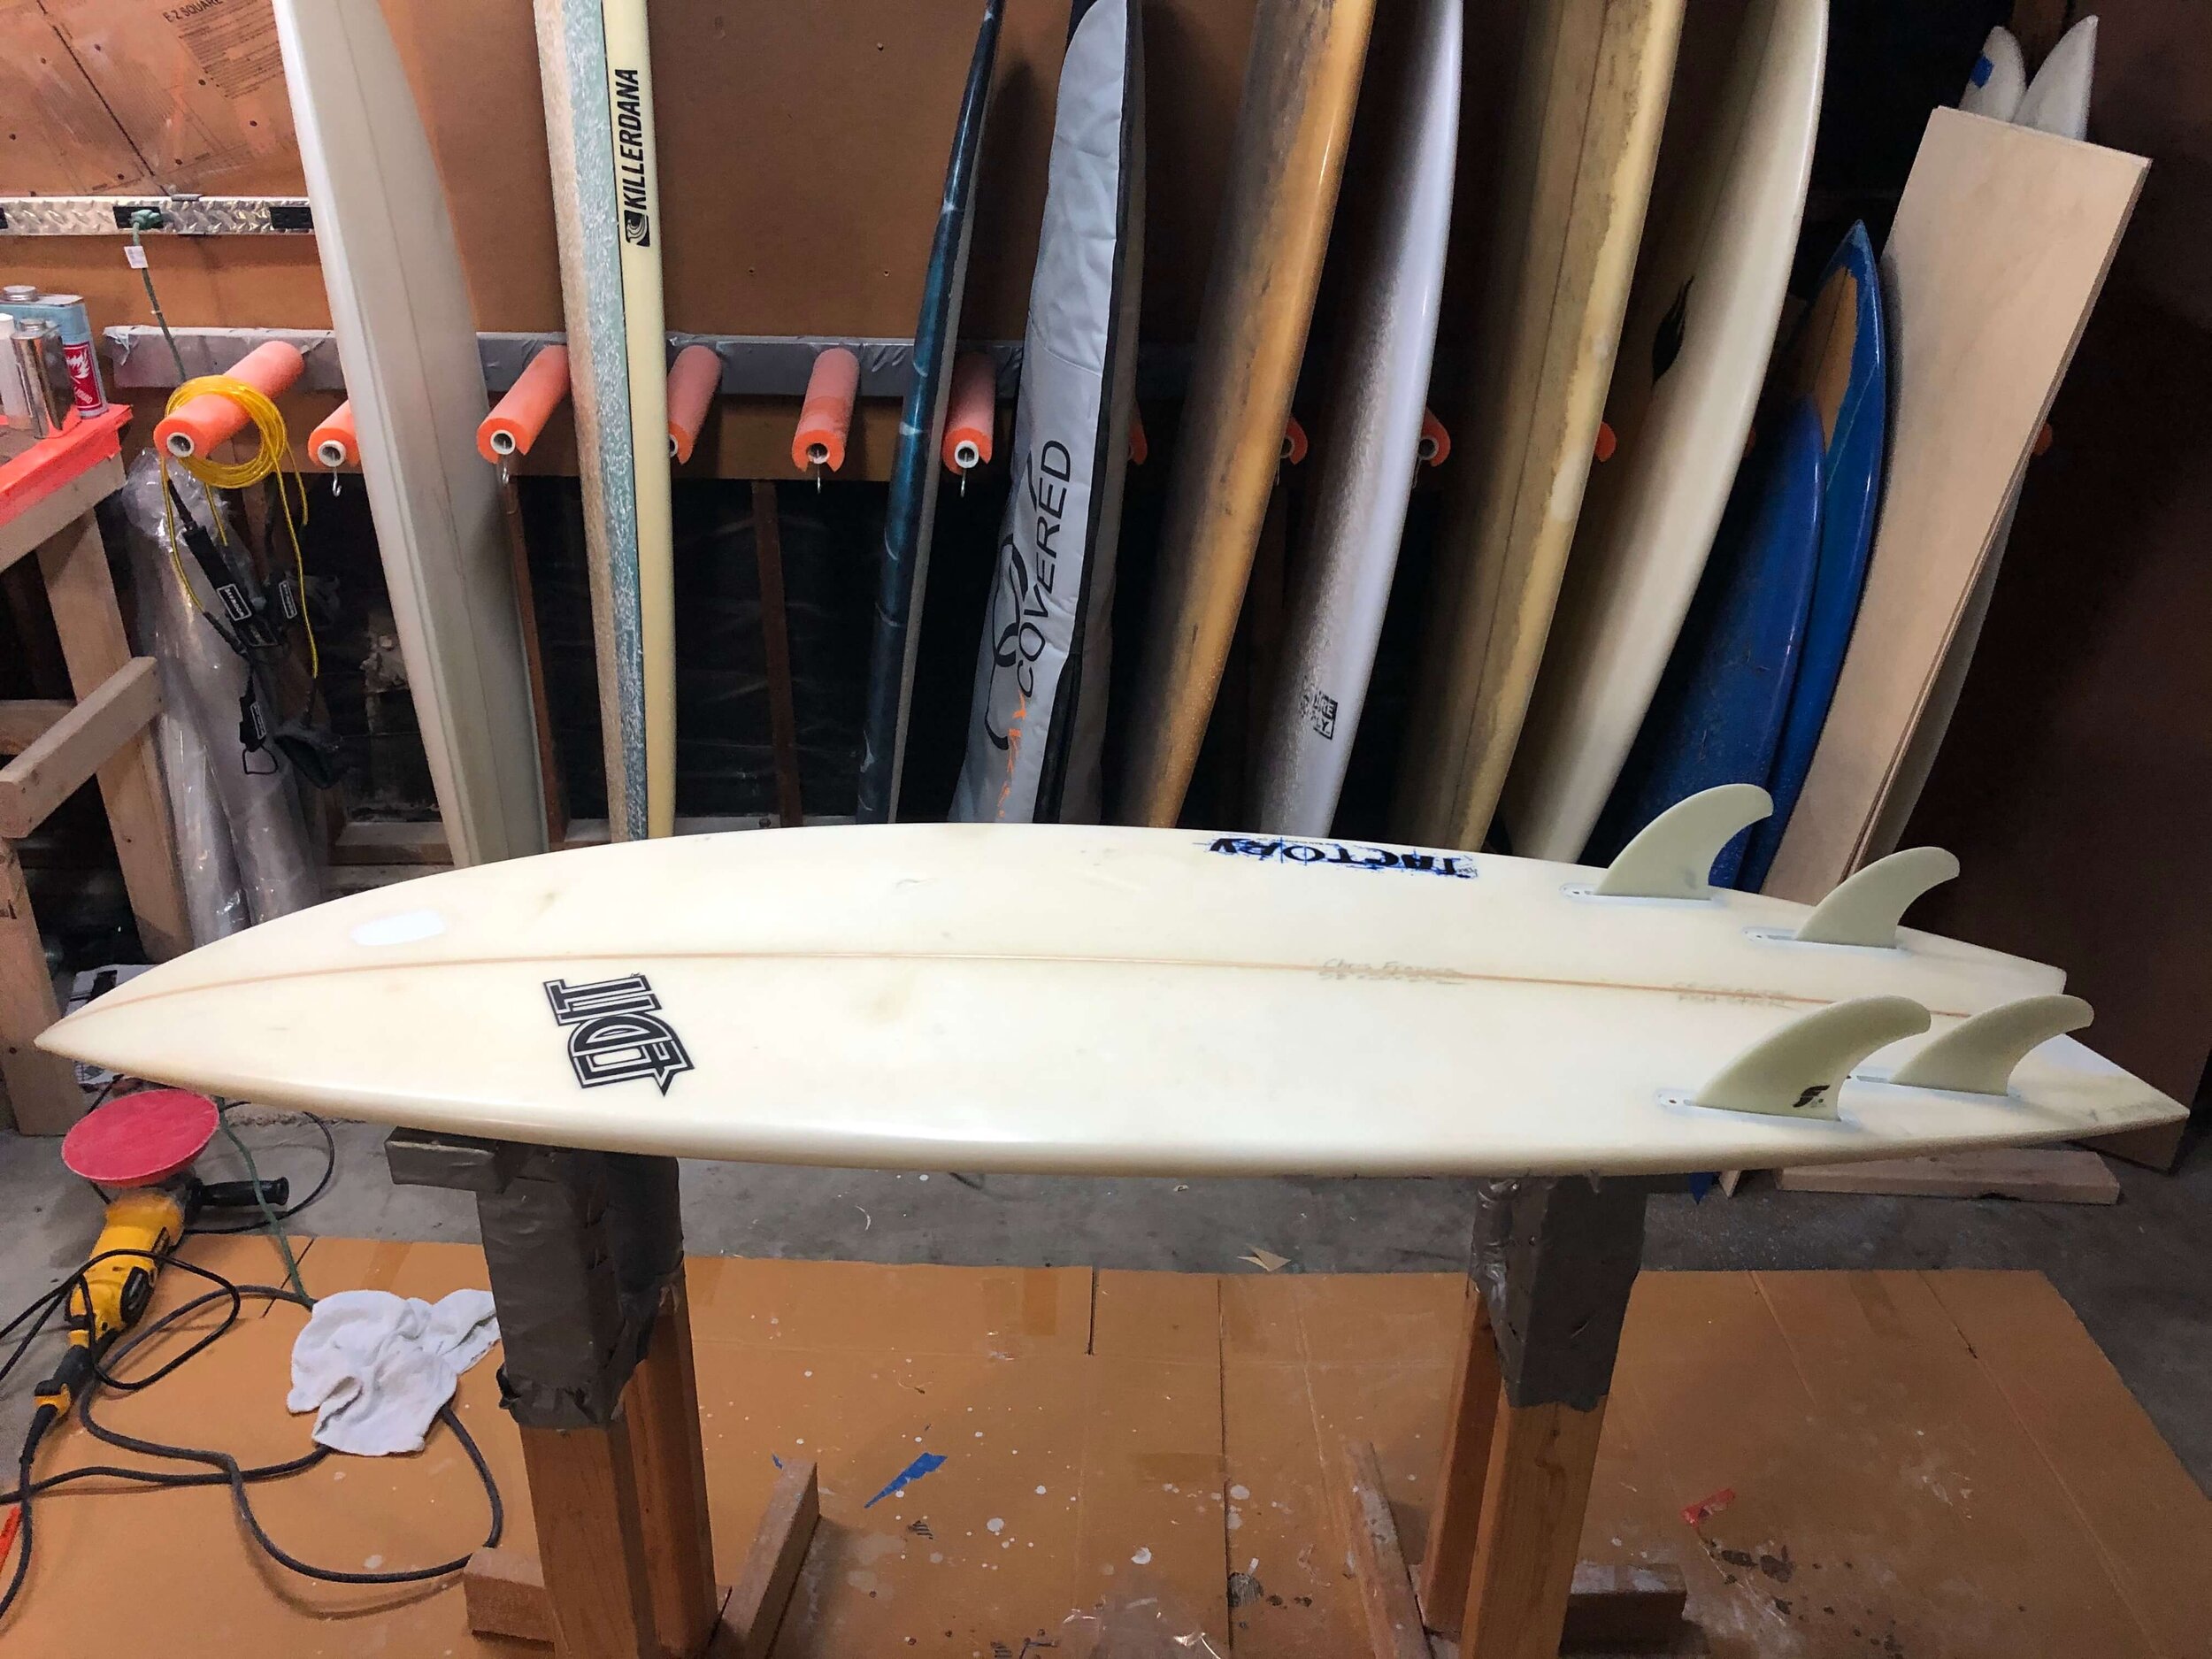
Surfboard Ding Repair For Beginners

Dings are an unfortunate reality for all surfers. For a long time, I would just take my boards to a local repair shop and they would do a great job, but over the years, the cost of taking boards to the shop started to add up and I decided to figure out how to do it myself. Fast forward a couple of years and I can now hold my own with ding repairs; although I still struggle with color matching. If you’re ready to start fixing your own dings, here is how to do it.
Materials Needed:
Laminating Resin
Sanding Resin (Or Surfacing Agent)
Cabosil (Or another thickener)
Fiberglass
Mixing Cups
Popsicle Stick
Spreader (I use old gift cards)
Chip Brush
Sandpaper (Power sanders make everything easier)
Utility Knife
Safety Gear
Tape*
Acetone*
Latex Gloves*
Pigment**
* These materials are optional, but very useful to have
** Only used if you are color matching
Step 1:
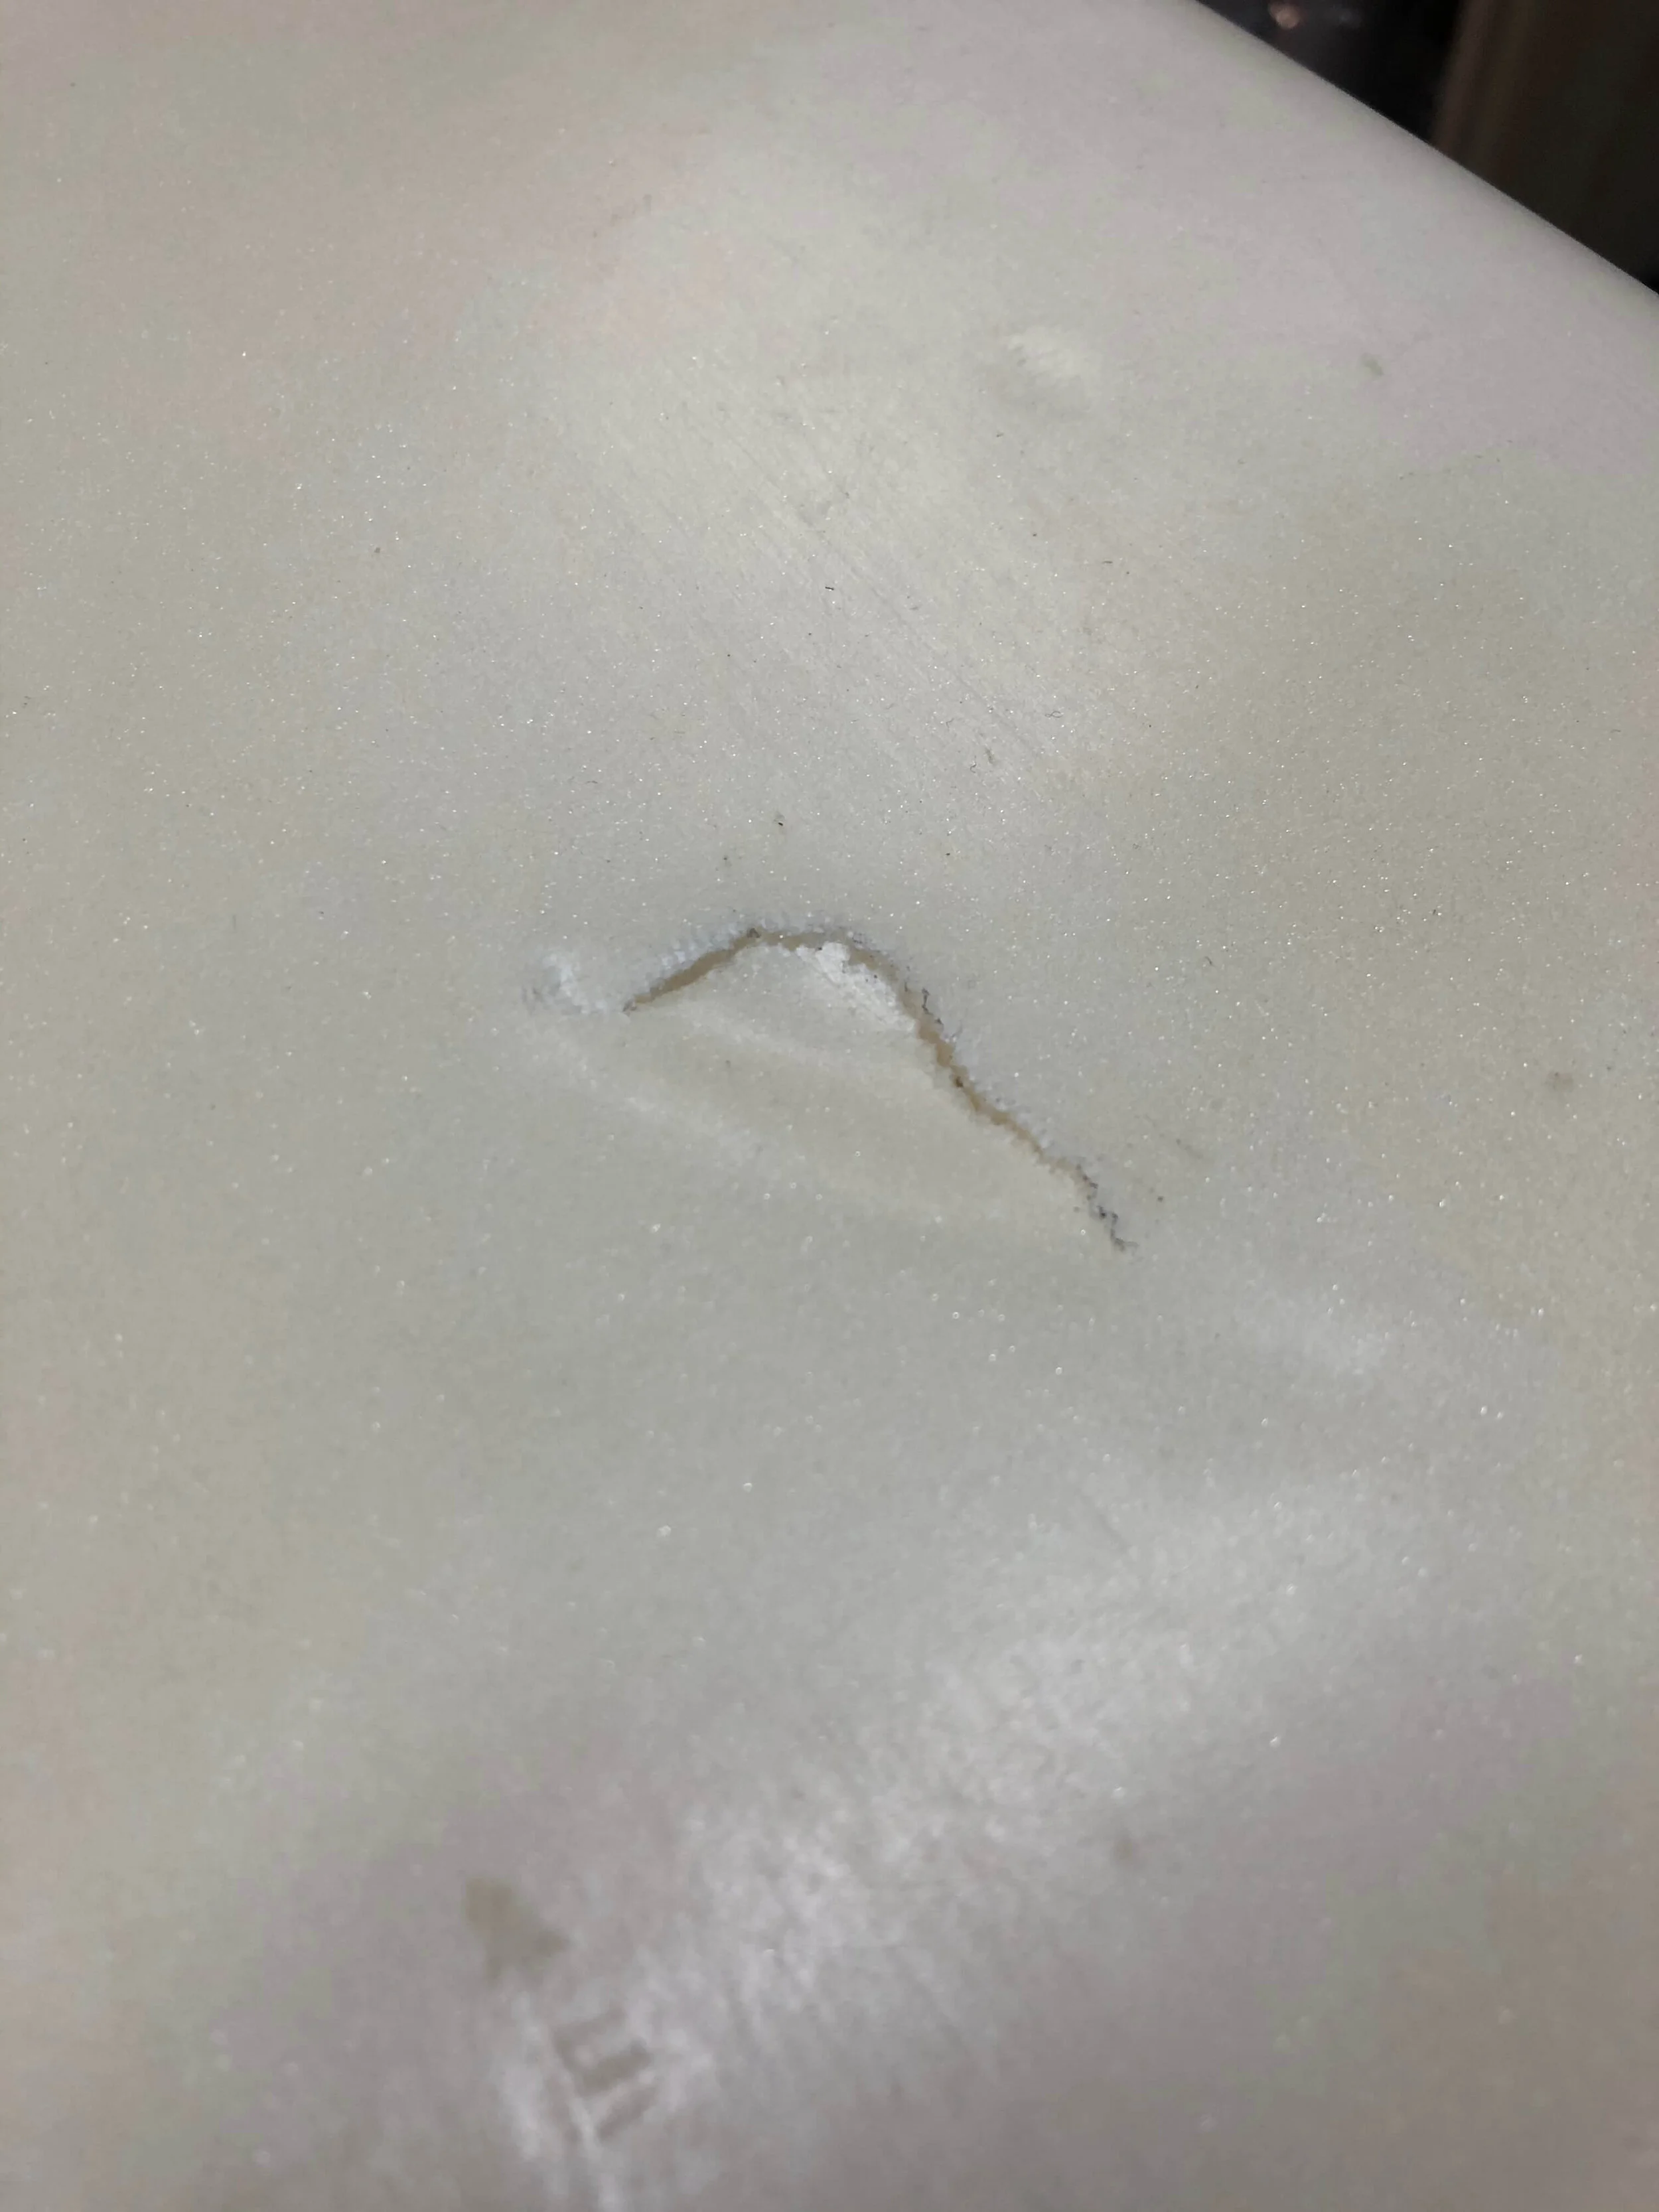
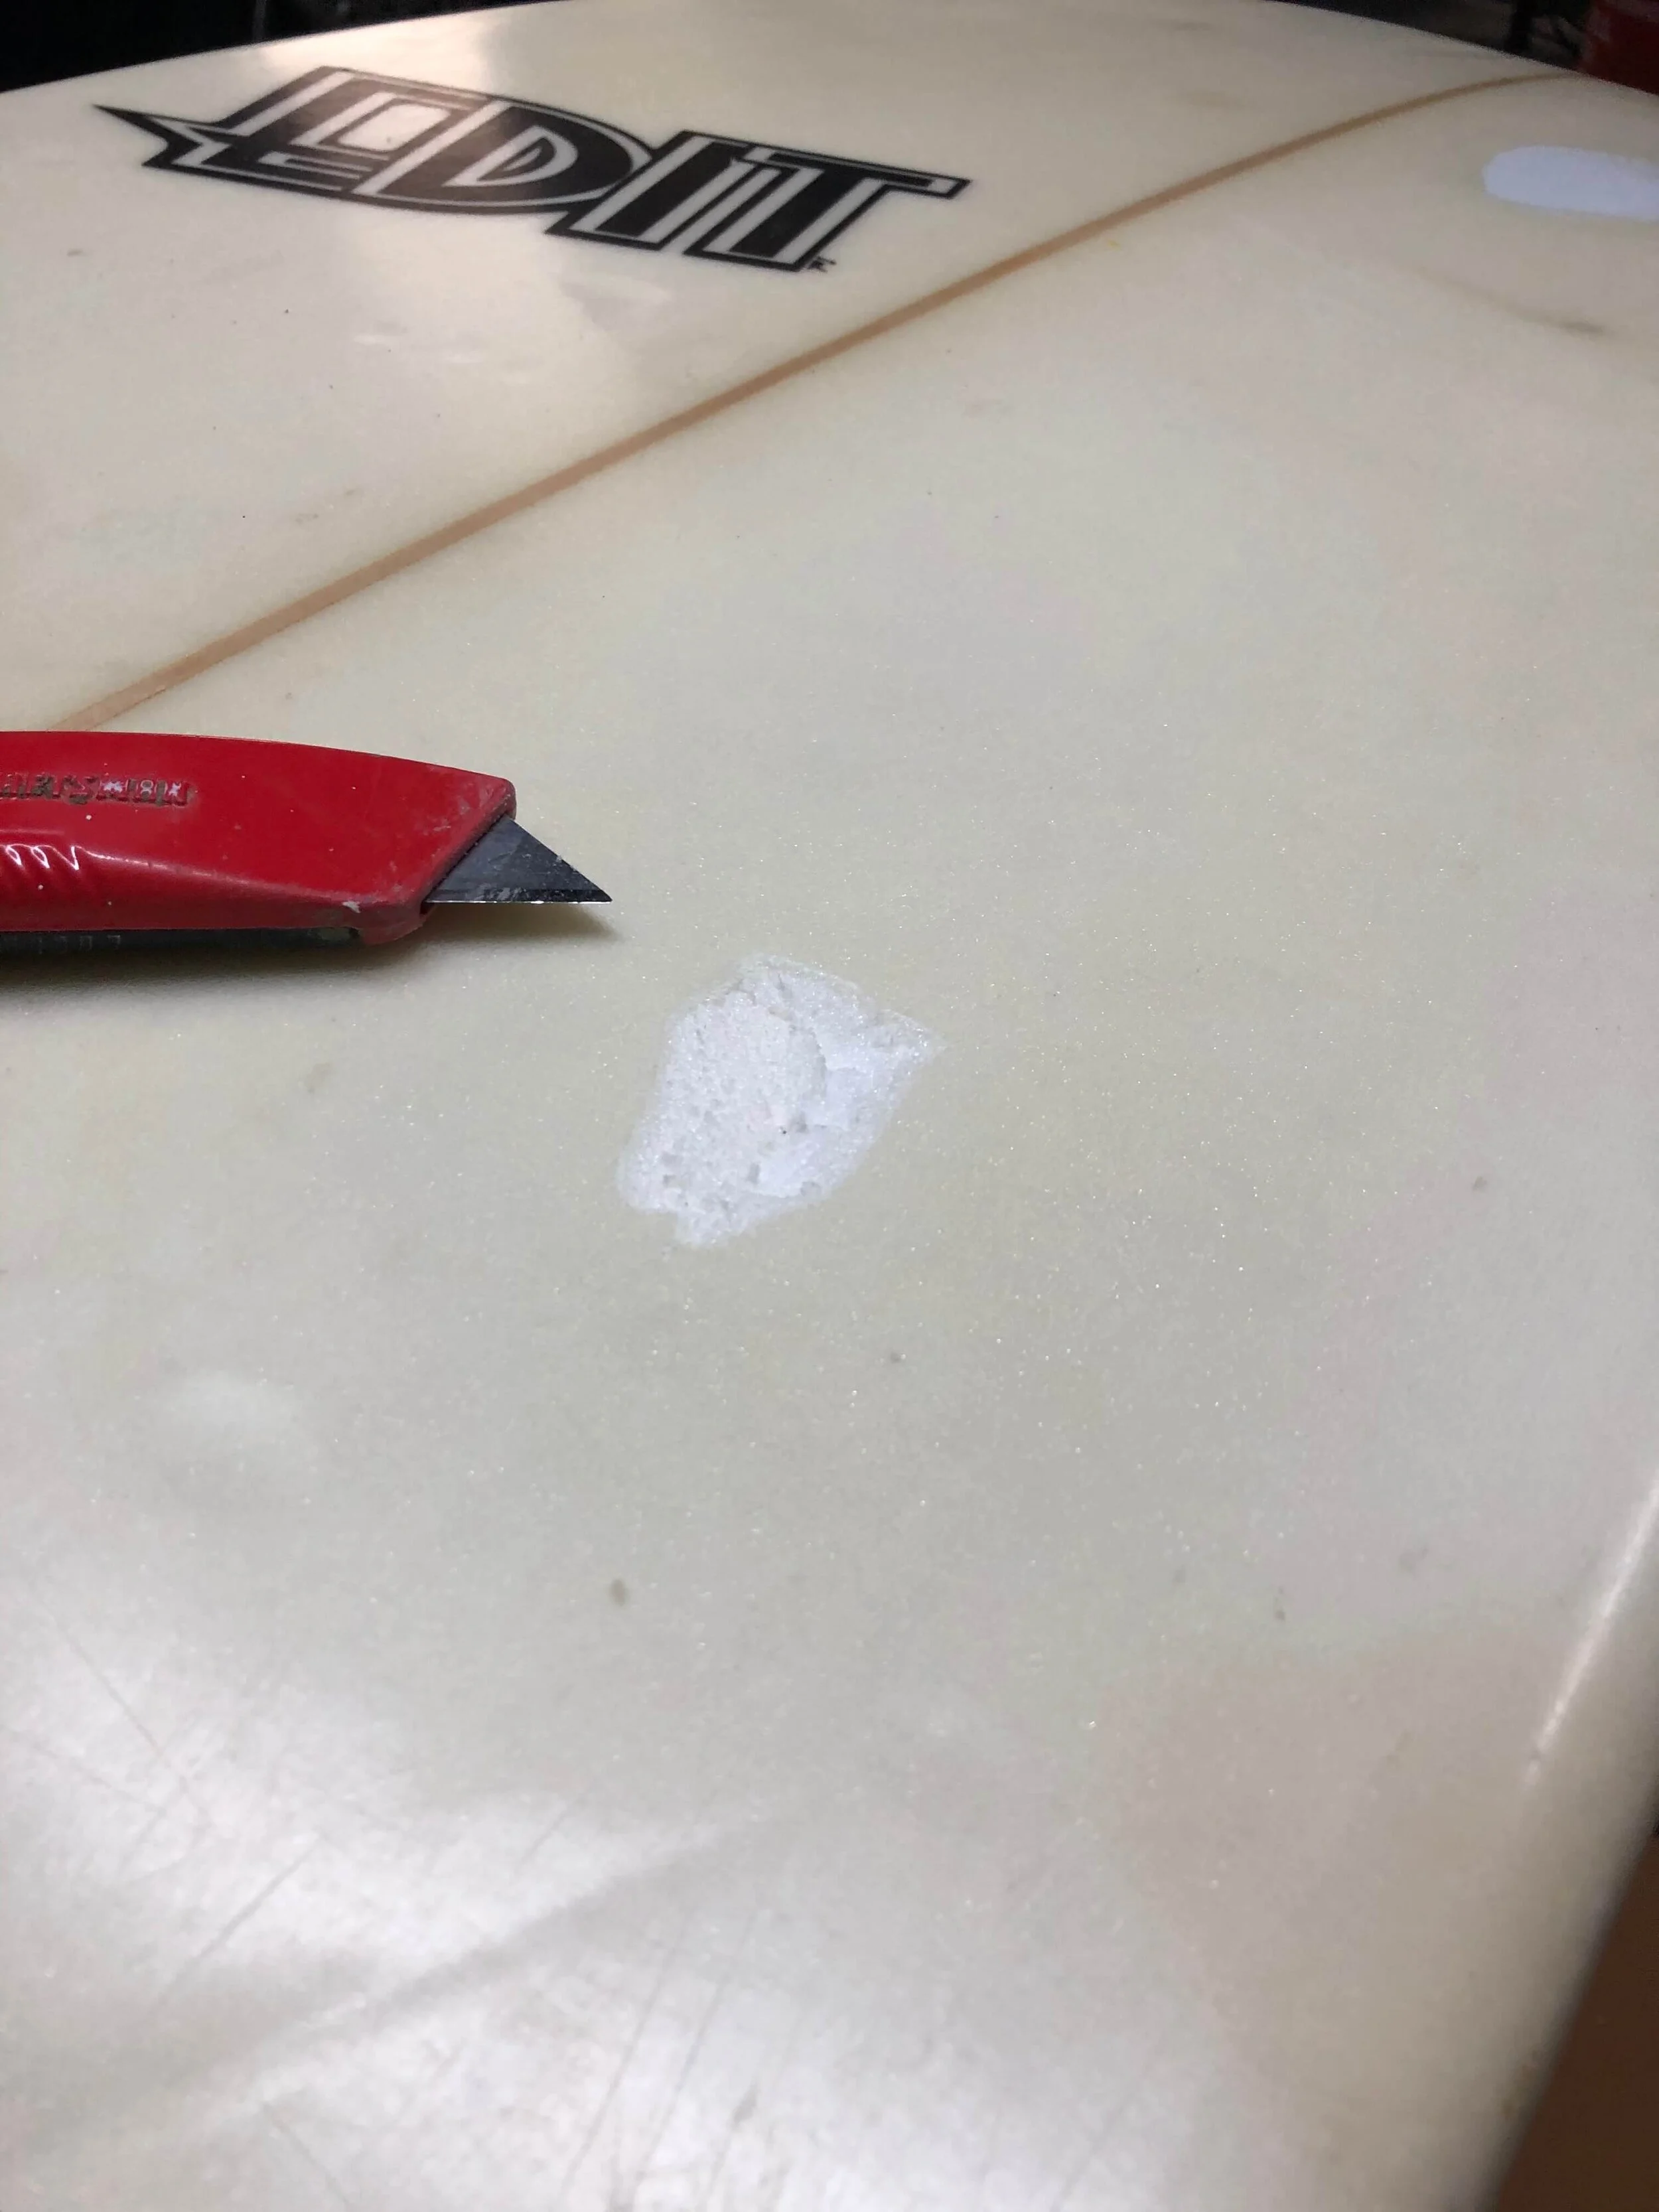
Prepare the Ding
First, you need to remove any damaged fiberglass and foam. In the ding I’m repairing I need to peel back and cut off the loose fiberglass. Using my utility knife, I cut out any loose glass and now have a nice little circle of exposed foam. I clean out any loose foam and then I’m ready to start sanding.
With this first sanding, the goal is to prepare the foam to be filled and to eliminate the hard edges from the fiberglass. I hit my ding lightly with some 60 grit paper to achieve this.


Step 2:
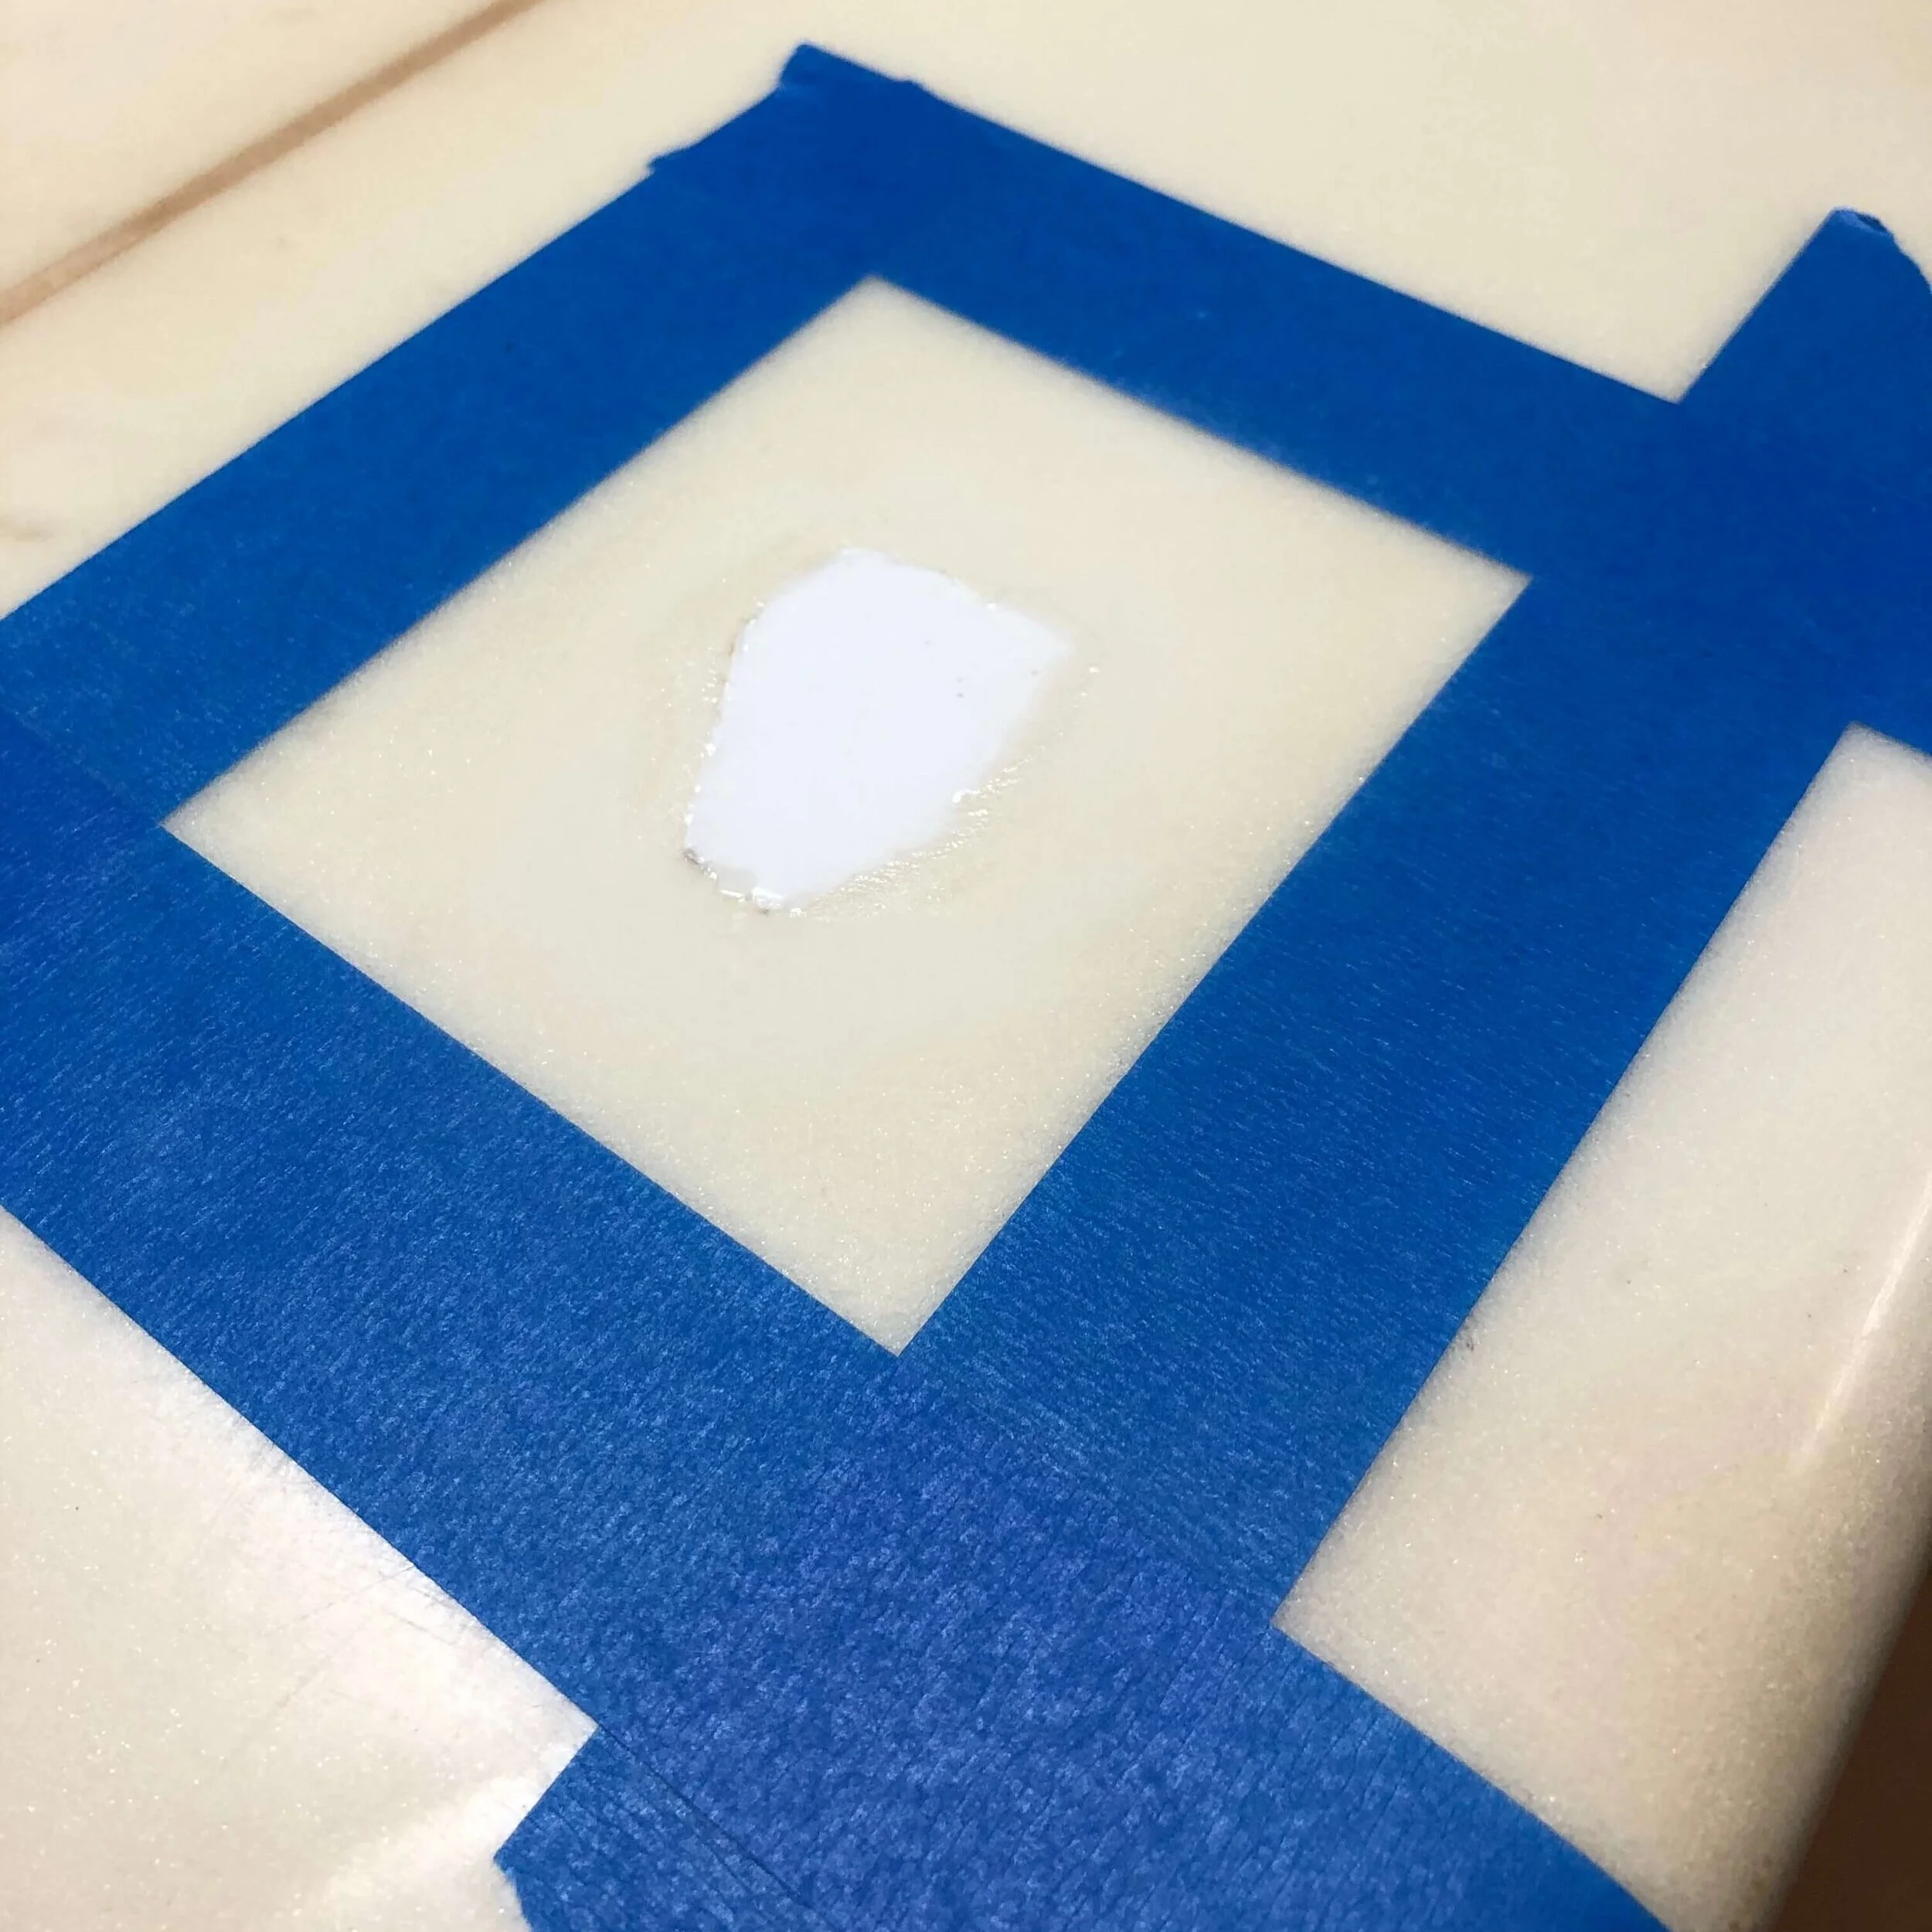
Fill the Ding
Now we start working with resin. I like to tape off my working area to help with keeping the rest of the board clean. Pour a little bit of laminating resin into your mixing cup and begin to add your cabosil (I have microballoons, but it's the same thing). Slowly add in cabosil while stirring, just be sure not to add too much. You want this mixture to be about the consistency of toothpaste.
If the foam of your board is colored, this is where you will want to match colors. Mix your pigment into your resin + cabosil mixture. Be sure to start with very little pigment because a little goes a really long way.
Once you’re happy with the thickness of your laminating resin + cabosil mix, add your catalyst. Be careful with how much you add because the more you add, the quicker the resin will ‘kick’ and begin to harden or cure. Be sure to look up a resin to catalyst mix chart - this is the one I use (Link). Mix your catalyst in really thoroughly and pour your mixture into your ding. Do your best to not add too much. You don't want the mixture overflowing onto the board. I like to keep the ding slightly under filled, as it saves me some sanding later (the fiberglass and the hot coat will fill it the rest of the way later on).
Once filled, let your resin cure. I usually leave it for at least an hour, but you should leave it longer if it's a large ding or if it's cold outside.
Step 3:
Sand
Sand down your cured mixture as well as the surrounding fiberglass. You want to sand until you start to see the weave of the fibers in the glass surrounding the ding. Sanding a surfboard by hand can be a real pain so feel free to use power sanders. Be careful not to sand too much though.
Step 4:
Lay Fiberglass
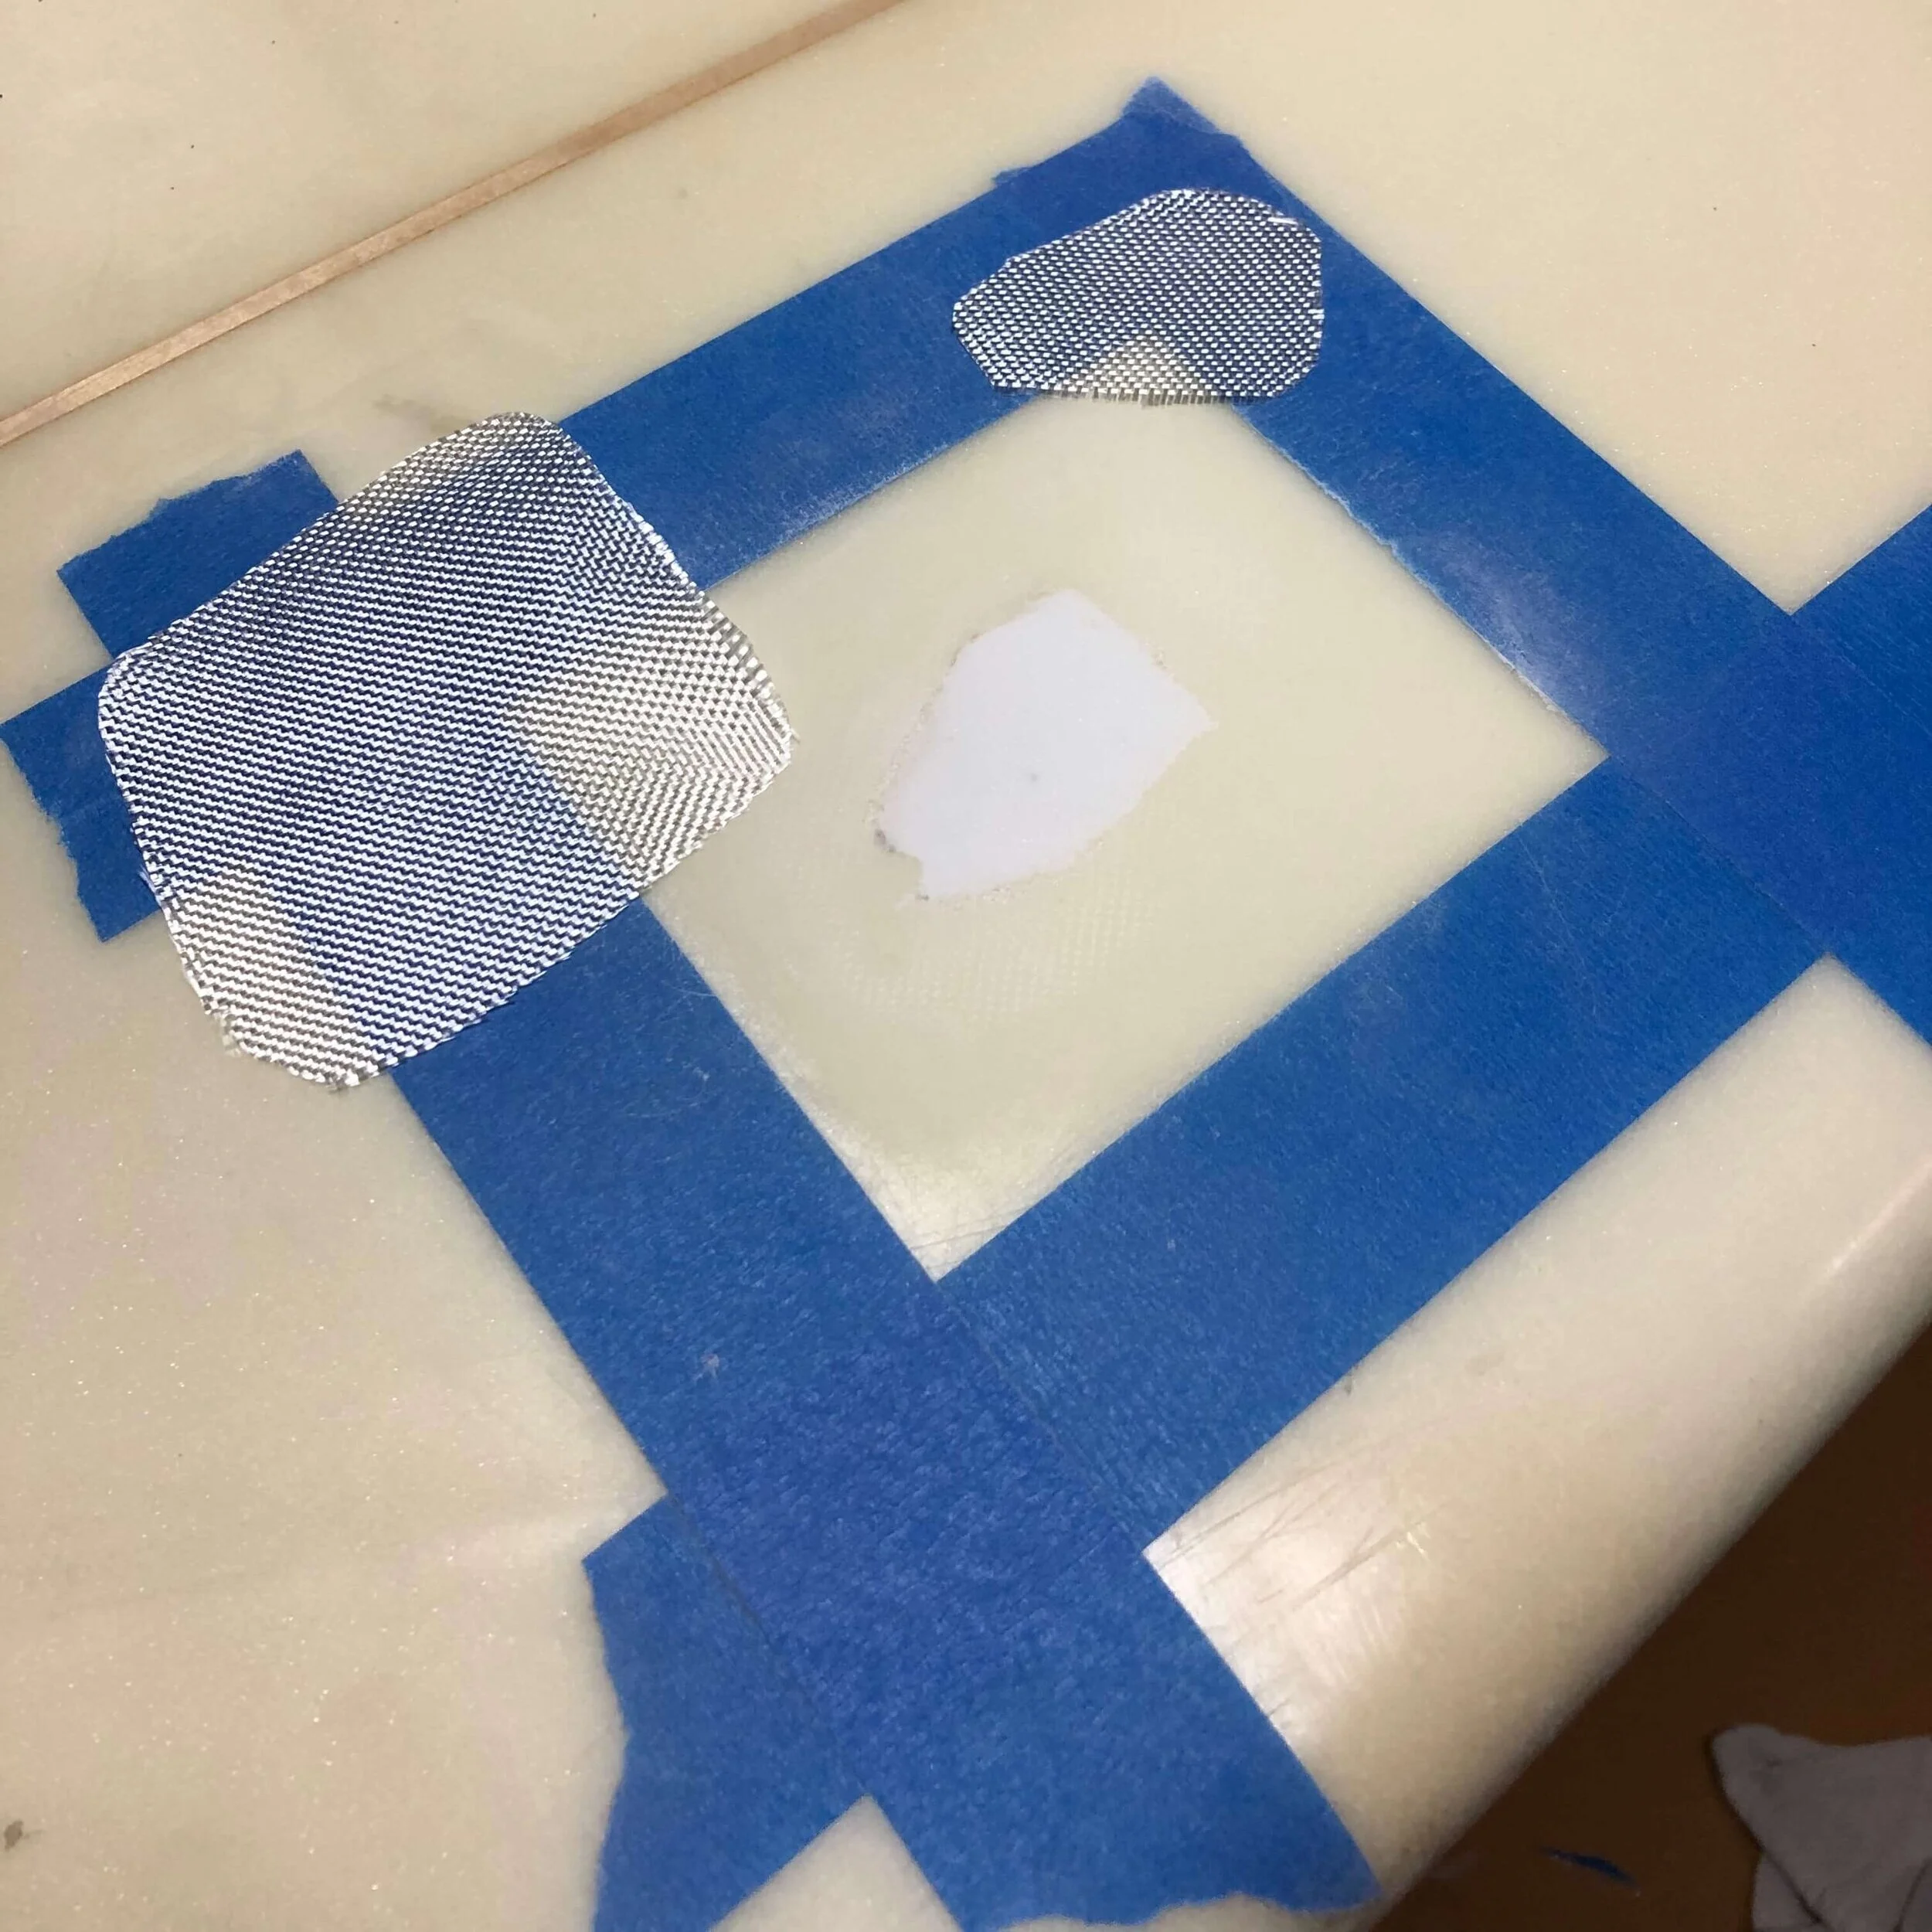
Next, you will need to seal off and strengthen your repair with a fiberglass patch. I like to use two layers of fiberglass; the first being a close outline of the ding; the second being a larger overlapping piece. Cut out your fiberglass and place them over your ding.
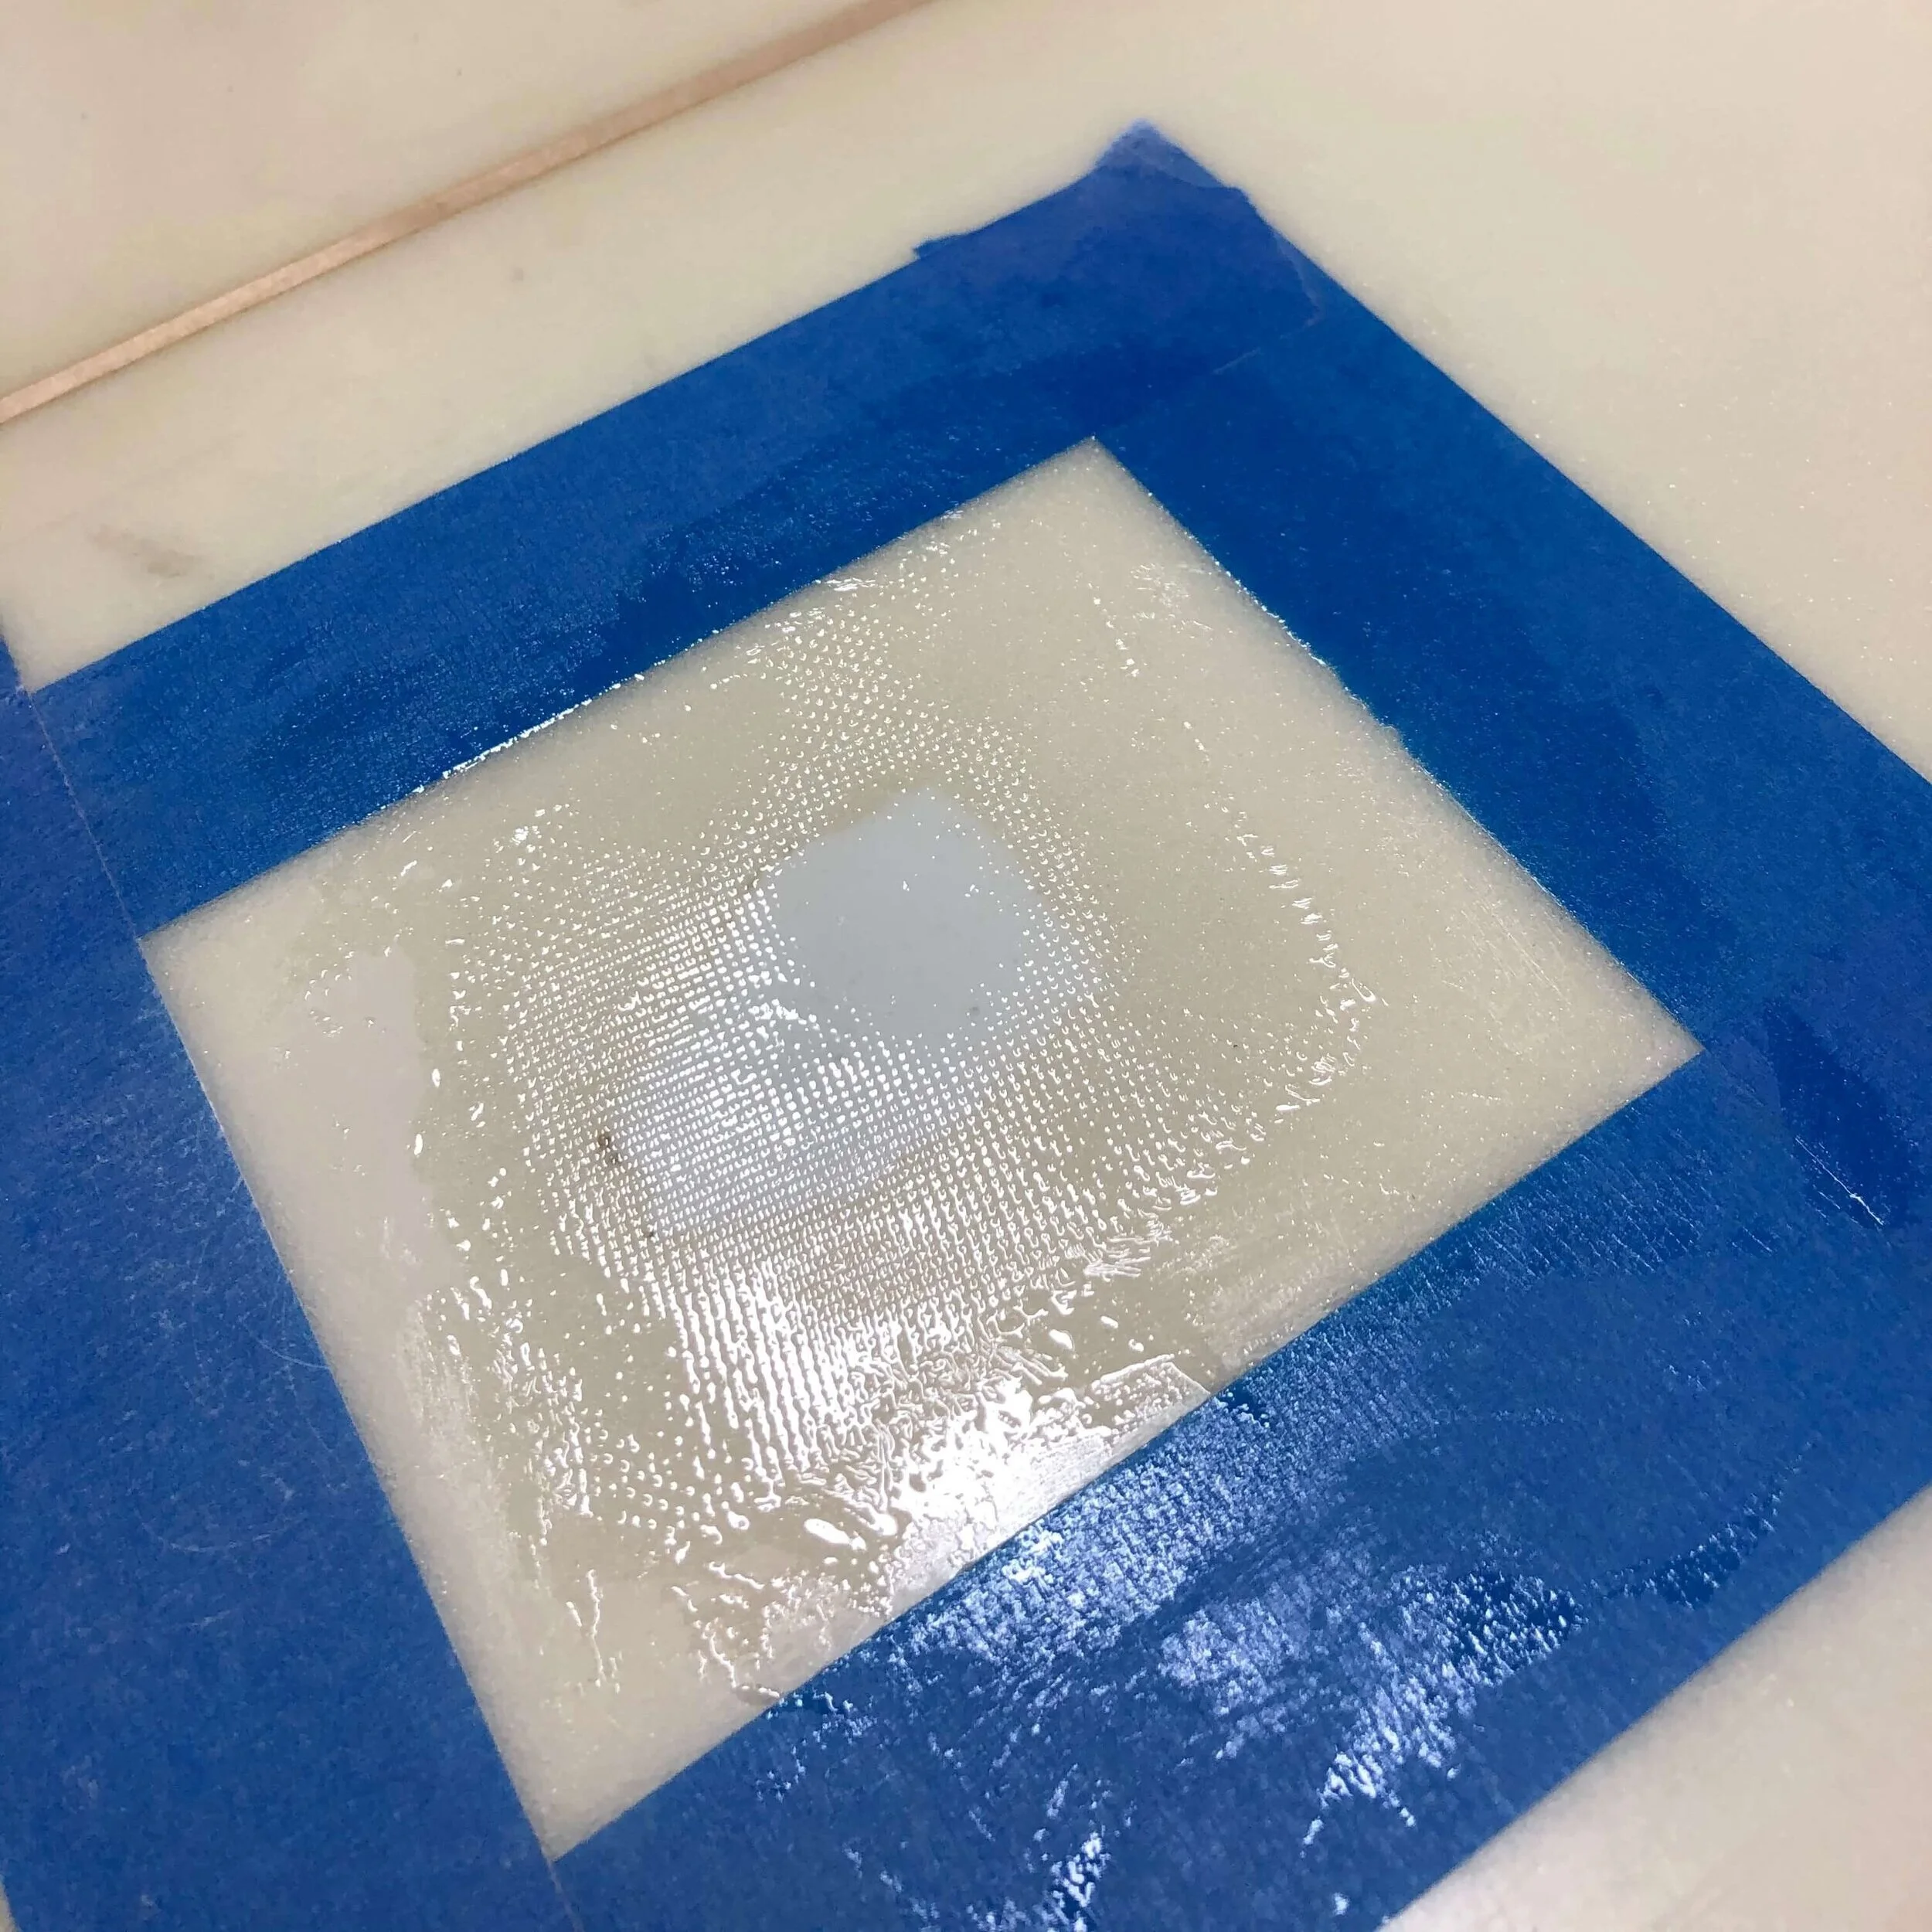
Now, mix another batch of resin. This time you won’t need cabosil, just your laminating resin and catalyst. Mix up your resin using the catalyst chart and pour it on your fiberglass. Using a spreader, (I used an old home depot gift card) spread your resin around all the fiberglass making sure it gets completely saturated. You should have gloves on for this part as your fiberglass cloth will want to shift as you spread the resin around and you’ll need to hold it in place. You’ll know its saturated once the fibers become translucent. Be sure to eliminate any air bubbles between your glass and the board by pushing them out with your spreader.
When the fiberglass is fully saturated, use your spreader to remove any excess resin. Ideally, if your ding is close to a rail, you can push the resin off the rail and let it drip on to the floor. My ding was towards the center of the board so I scraped the excess off my new fiberglass and onto the tape. I then used paper towels and acetone to remove it from the board.
Having acetone nearby is very helpful but you have to be careful with it. It dissolves uncured resin and is great for cleaning up drips, but you want to keep it away from your patch as it can ruin your work.
Once finished, you should be able to see the weave of the fiberglass when you look closely. Now let it cure.


Step 5:
Sand
Once cured, sand down your fiberglass patch. I like to use a medium grit (~150) for this step as I don’t want to sand through the fiberglass. Once finished, your repair should be just under the level of the rest of the board.
Step 6:
Hot Coat
You’re almost done! This is the final coat of resin. For this coat, you’ll need sanding resin, or you’ll need to add surfacing agent to your laminating resin. Sanding resin or surfacing agent contains a type of wax that will allow you to sand the resin better and gives you a nice finish to your board.
You’ll need to prepare your chip brush before mixing the resin by removing any loose strands. These brushes are cheap for a reason and you don’t want a loose strand in your finished ding. I have heard of people using foam brushes to some success, but I have not personally tried it. It’s also important to note that you shouldn’t use a nice paint brush for this step. The resin will cure in the brush only allowing it one use and you don’t want to ruin a nice brush.
When adding your catalyst, you’ll want to use about double what you did with the previous steps. This will cause the resin to kick faster, giving you less time to work with it. Make sure everything is prepared before you begin. Mix thoroughly, and use your chip brush to apply the resin over your repair. Pass over the resin with your brush multiple times to make it as smooth and even as possible. Let cure.


Step 7:
Final Sanding
Once cured, sand down the hot coat using increasing grades of sandpaper. I start with 150 grit and work my way up to wet sanding with 500 grit. Focusing on the edges of the fiberglass will help to blend your repair into the rest of the board. Once you’re satisfied with the results, go shred.

Before

After
Hopefully this guide has been helpful and can save you some money over the years. Ding repair is not really that hard, but is difficult to master. I recommend learning on a board that you don’t care too much about. I would love to hear about your ding repairs in the comments below!
Stay Stoked!